

PRODUCT TUTORIALS
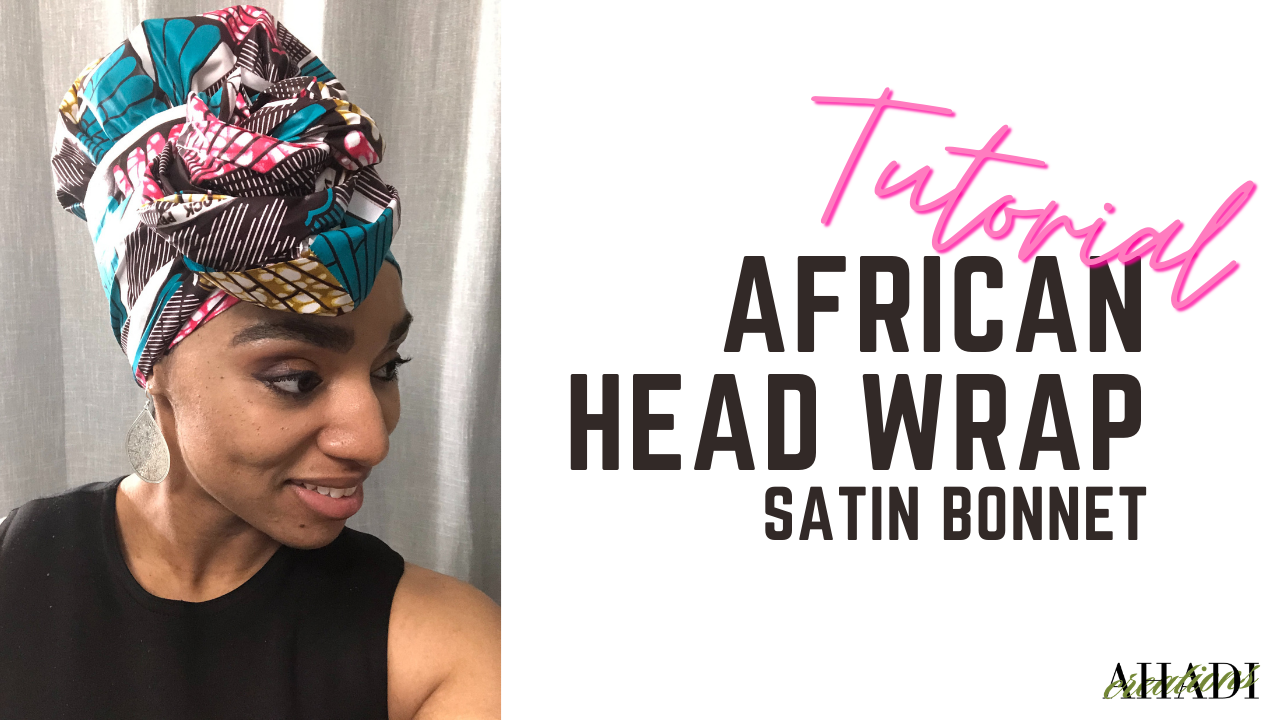
In this tutorial you will see how to wrap our African Head Wraps available in our shop. This video will show one simple wrap look. The first part of the video will show how to wrap and at the end you will see how simple it is to take down. Let’s get started!
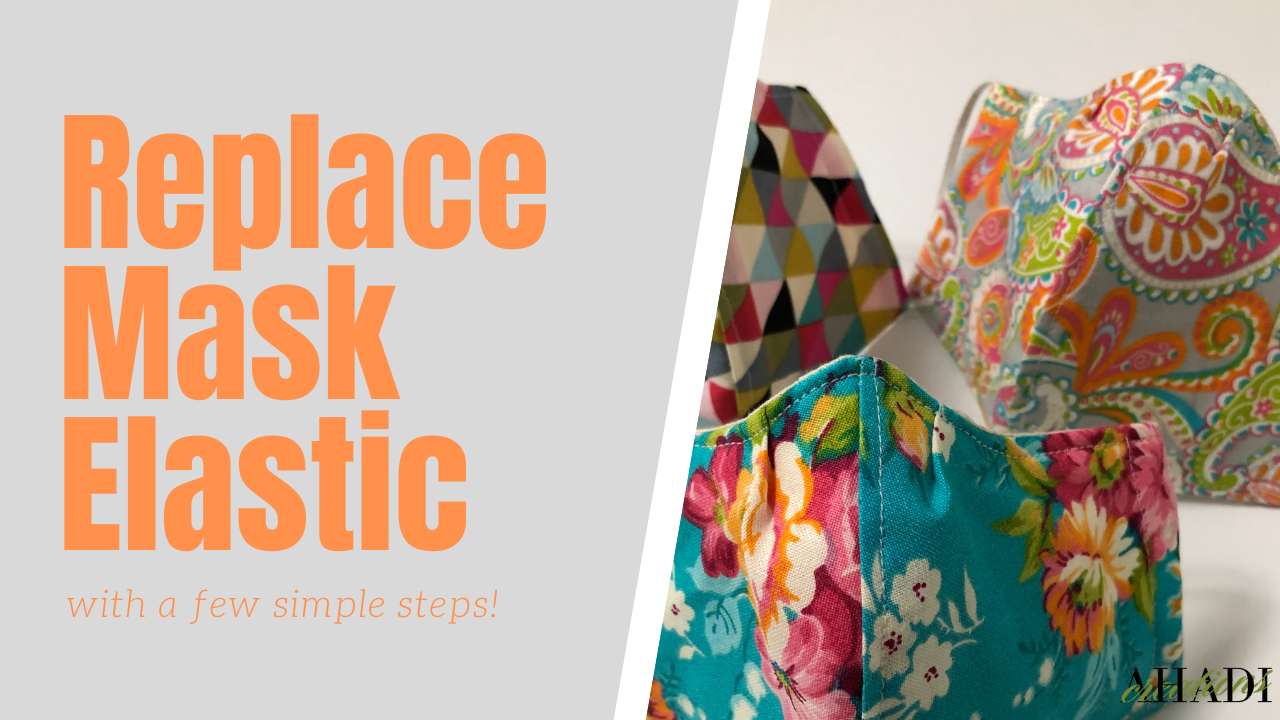
Learn how to replace the elastic in your reusable mask from our shop. Let’s get started!
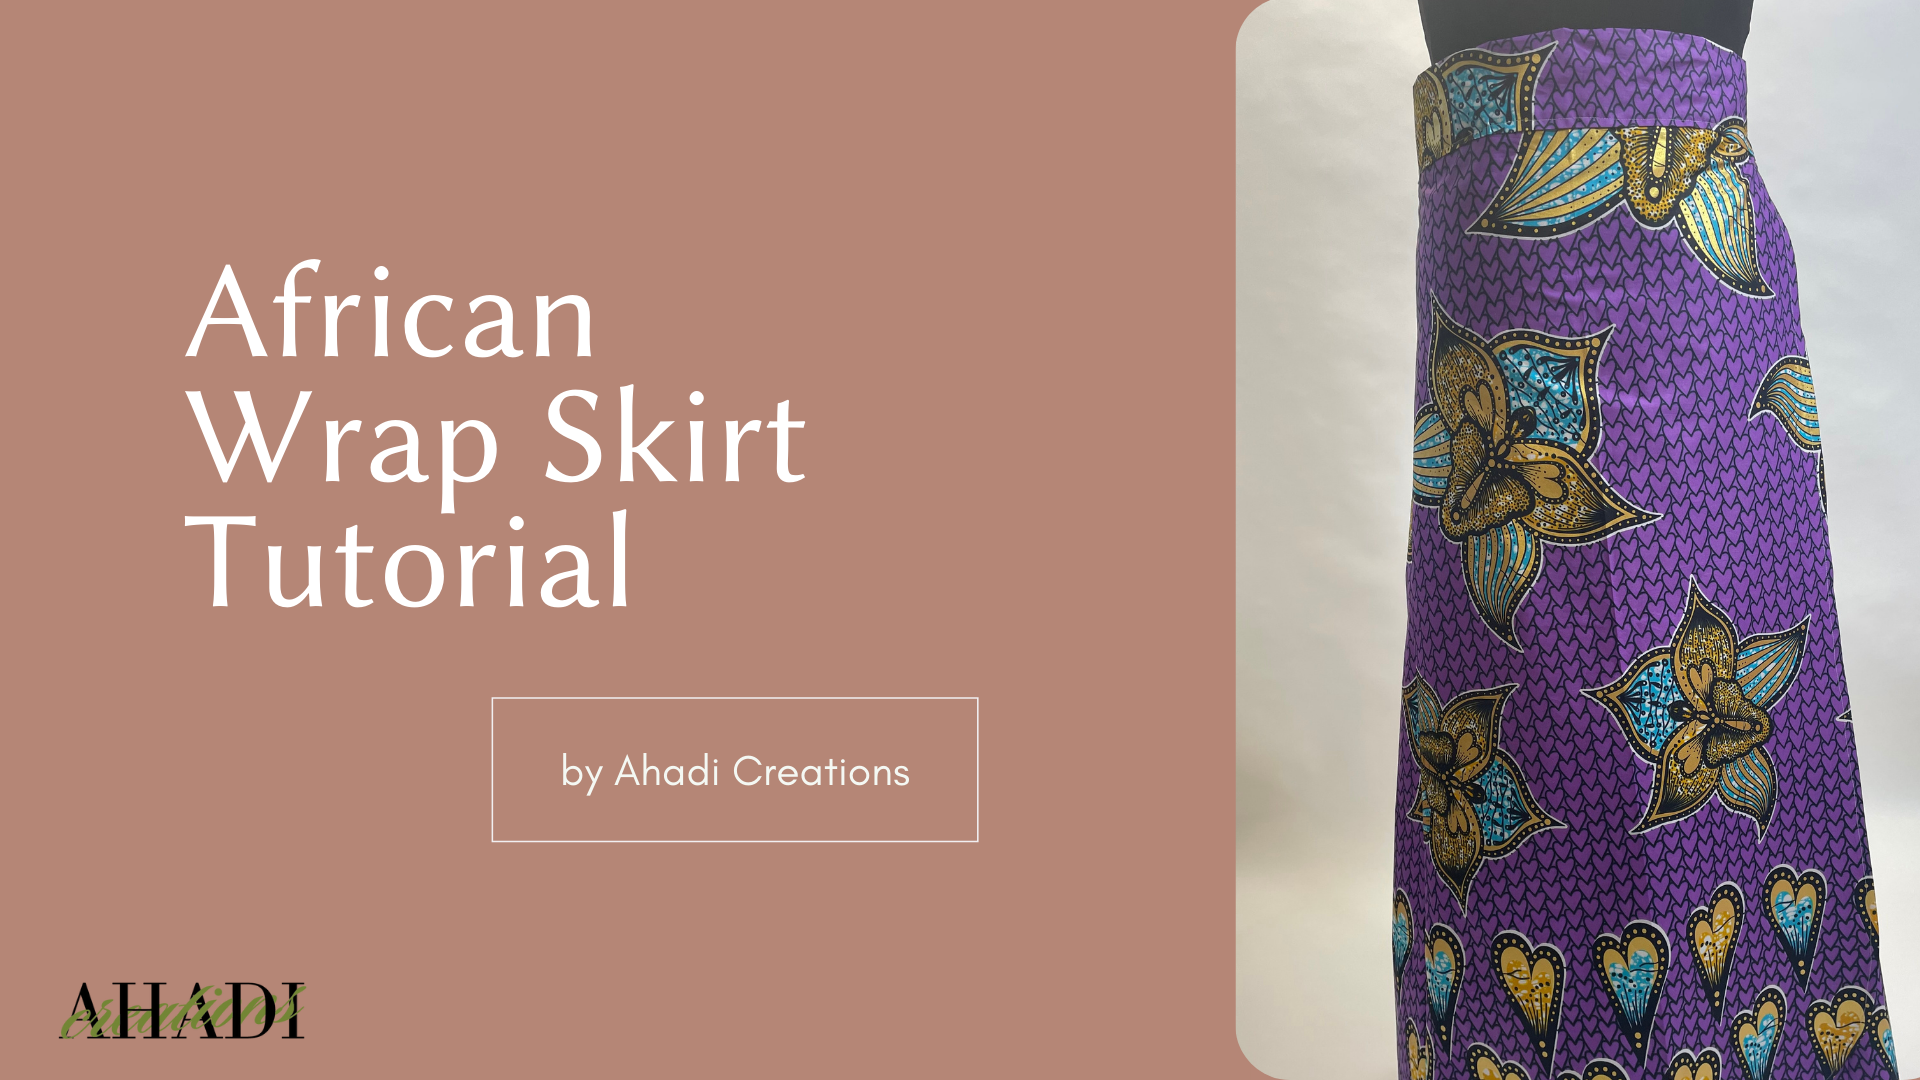
Learn the simple steps for how to properly wear the African Wrap Skirt available in our shop!

In this tutorial we will learn how to create a knot with the Boho Head Wrap from our shop. It’s important to remember that no two knots will be the same. But all are equally beautiful once styled! Let’s get started!
Need Step-by-Step Directions? Click any button below to view the steps.

How To Wrap Our African Head Wraps
Learn how to wrap our African Head Wraps available in our shop. These directions will show one simple wrap look. Let’s get started!
Steps Broken Down:
Here’s a breakdown of steps mentioned in the video above.
Place the silk bonnet on your head, it should be slightly back from your hairline about an inch so that you can see some of your hair. This allows the bonnet to look a little more full at the top.
Find the middle of the hair tie and place the middle at the back of your head, covering your hair and bonnet.
Bring both ends forward crossing them in the front of your head. Arrange the ties so that they come far down enough to the length that you would like around your forehead.
Bring the ties to the back and cross again. Bring to the front. Make sure you pull the hair ties to a comfortable fit so that it is secure around your head but not too tight.
Once the ties are in the front again, create a knot to keep the tie in place. Put the knot on the side you want the finished bun to be. Either the left or the right.
The knot should hit around the hairline not the bottom of the forehead where the hair tie begins.
Open up the hair tie so that it is flat and no longer tightly squeezed from wrapping. This helps the knot look a little fuller.
Hold the knot in place while wrapping both ends of the tie around the knot in a circle. Once wrapped completely around the knot once, tuck some of the tie underneath the circle you just made.
Repeat the previous step alternating the direction you wrap until you have no more tie to wrap and tuck.
Adjust the bonnet portion in your head as needed. Enjoy the look!
Unwrapping Hair Ties:
Unwrapping the hair ties are super easy!
Just pull down on your bun that you wrapped.
Take out your knot. Unwrap the hair tie from around your head.
Remove the silk bonnet. That easy!
Thanks so much for watching and reading this tutorial!
We would love to hear your feedback on how much you love your African head wrap.
How To Replace Your Mask Elastic
Learn how to replace the elastic in your reusable mask available in our shop.
Here are the simple steps required to have a like-new mask! Let’s get started!
Supplies Needed:

Supplies needed to replace elastic.
Mask
Ruler
Scissors
Elastic
Needle & Thread (optional)
Safety Pin (small safety pin if available works best)
Before choosing a method below to replace your elastic in your mask cut two new pieces of elastic to your desired length.
For adults, elastic should be anywhere from 7-9 inches long depending on how stretchy your elastic is. If you do not know how long to cut a piece I would recommend cutting a 9 inch piece so you can shorten it if needed once complete with the process. If you cut it too short you will waste elastic as you cannot lengthen once you cut.
Children’s elastic is generally 5-7 inches long depending on the child and how stretchy your elastic is. Normally adjustable straps are best for children if possible. (Available in the shop!)
Steps Broken Down (2 Methods):
Here’s a breakdown of steps mentioned in the video above.
A. If your elastic is broken but still inside the mask OR your elastic is too tight or loose:
Cut the knots of the current elastic pieces if needed.
Tie one new elastic piece to the current piece, or use a safety pin to place one end of the old elastic and an end of the new elastic on the same safety pin.
Use the old elastic to pull the new elastic through the fabric casing or opening.
** Stop pulling the old elastic once the safety pin has popped out the other end and the new elastic is in the mask.Make sure that your elastic did not get twisted inside. Straighten out if needed.
Bring both ends of the new elastic together and secure the ends by hand stitching as shown in the video or a simple knot if preferred.
Test the closure by pulling both sides to make sure your knot or stitch doesn’t pop when pulled.
Repeat on the remaining elastic piece.
Try on mask, adjust again if needed, or until you achieve your desired fit.
Enjoy!
B. If your elastic has been removed from your mask:

Inserting safety pin through opening.

Safety pin coming out opposite end.
Place a safety pin (small safety pin if available) on one side of one piece of elastic.
Feed the elastic through one side of the mask in the opening for the elastic, as shown in the video.
You may have to wiggle and push a little to get the safety pin through the side opening. (Refer to the picture on the left above.)
Once you get the safety pin in the opening, push the pin with one hand toward the opposite opening, while at the same time pushing the fabric towards the safety pin. This will help to move the pin along until the pin pops out on the other side (refer to picture above on the right).
Complete step 4 again on the other side of the mask.
Make sure that your elastic did not get twisted inside. Straighten out if needed.
Bring both ends of the new elastic together and secure the ends by hand stitching as shown in the video or a simple knot if preferred.
Test the closure by pulling both sides to make sure your knot or stitch doesn’t pop when pulled.
Repeat on the remaining elastic piece.
Try on mask, adjust again if needed, or until you achieve your desired fit. Enjoy!

How To Tie the Boho Head Wrap
In this tutorial we will learn how to create a knot with the Boho Head Wrap by ahadicreations.com. It’s important to remember that no two knots will be the same. But all are equally beautiful once styled! To demonstrate this in the video, I will wrap this Boho Head Wrap twice just so you can see the difference, but yet the concept or look remains the same. Variations in the knot come from how tightly the fabric is twisted and the direction in which it is twisted. Let’s get started!
STEPS BROKEN DOWN:
Prior to beginning to put your Boho Wrap on your head place hair into a small high bun for the best fit if applicable to you.
Locate the center back of one edge of the fabric. Such as where the label is placed on the wrap. Fold the finished edge under a little if desired, this hides the edge of the fabric.
Bend forward a little to make it easier to wrap the fabric on your head.
Place the end you folded on the back of your head covering your hairline or where desired.
Bring the rest of the fabric towards the front and pull all areas of the fabric tightly around the center front of your forehead.
Cross one side of the fabric over the other allowing you to twist the fabric together.
Adjust the location of the fabric on the front top of your head where you would like it to come. For example, either to cover your hair line or leave some hair showing.
Twist the fabric tightly together.
To wrap the knot, push the twisted piece up to make it bendable or a little looser as shown in the video.
Wrap the fabric in a circle until there is only a little piece remaining. Tuck this end somewhere under the knot you just created, such as in the center if possible.
Adjust as needed. Enjoy!
Thanks so much for watching and reading this tutorial!
We would love to hear your feedback on how much you love your Boho Head Wrap here.